Howto setup Zotero
Installation
The easiest way to install the latest Zotero on Ubuntu is to use Flatpak. If you are on elementary OS, its really easy to install: Just head over to Zotero on Flathub, click the Install button and when your browser prompts you, select Open with: Sideload.
Setup Syncing
Once you installed Zotero, we need to setup the library sync. To do so, start Zotero and go to Edit > Settings > Sync, enter your Username and Password click Set Up Syncing.
Sync attachment files in My Library with WebDAV
Once you are succesfully connected, we now need to setup syncing of attachment files with your Nextcloud backend. This can be done in Edit > Preferences > Sync as well. Just make sure you select ✓ Sync attachment files in My Library using: WebDAV and enter your Nextcloud server details in the shown form:
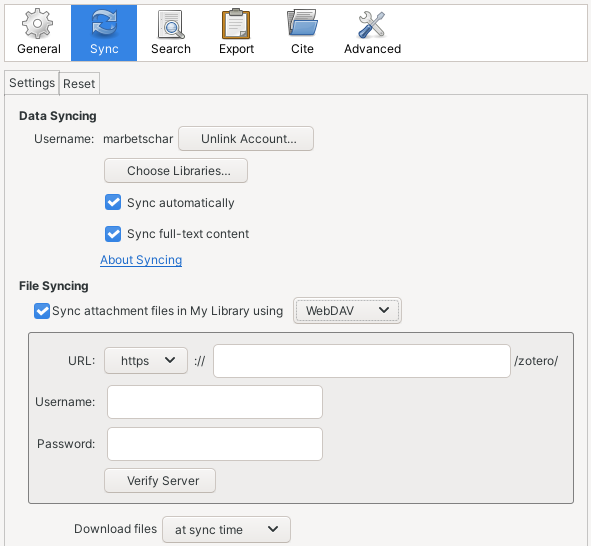
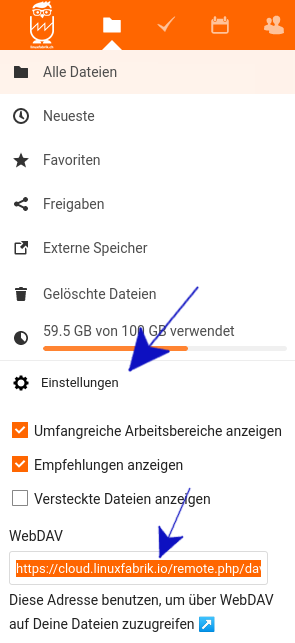
Make sure you use the right WebDAV URL by copying it from the Nextcloud web interface:
Zotero Connector
As last step, you want to install the Zotero Connector. It makes it easy to add interesting stuff to your library right from your web browser. For installation, visit the download page of the official Zotero website and click Install Connector.
PLEASE NOTE: Zotero needs to be running for the Connector to work properly.
ZotMoov Extension
Install the ZotMoove extension from its GitHub repository. Then restart Zotero and configure the extension in Edit > Settings > ZotMoov:
ZotMoov:Directory to Move Files To:
~/Nextcloud/Leseraum
Other SettingsFile Behavior:
MoveDisable Automatically Move/Copy Files When Added
Enable Automatically Move/Copy Files to Subdirectory
Subdirectory String:{%T}
Now you can move attachments to and from ~/Nextcloud/Leseraum simply by using right click and ZotMoov: Move Selected to Directory or ZotMoov: Move Selected from Directory.
BetterBibTex Extension
Install the BetterBibTex extension and configure it according to the Zettlr docs. It should export the library to ~/Nextcloud/Notes/assets/Library.json